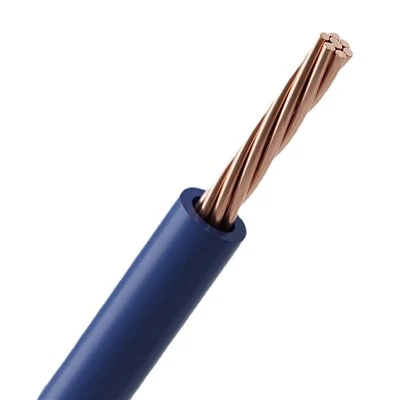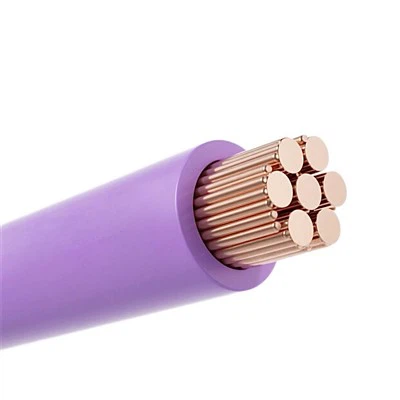

Hey there! I'm a supplier of Japanese car wire, and I've seen firsthand how crucial it is to install those wire connectors properly. Whether you're a DIY enthusiast or a professional mechanic, getting this right can save you a ton of headaches down the road. So, let's dive into the nitty - gritty of how to install Japanese car wire connectors like a pro.
Understanding Japanese Car Wires
Before we start talking about connectors, it's important to know a bit about the wires themselves. Japanese cars often use specific types of wires, such as AVSS Wire, AEX Wire, and [AVS Wire](https://www. ab.com/automotive-wire/japanese-car-wire/avs-wire.html). These wires are designed to meet the high - quality standards of Japanese automakers.
AVSS wire, for example, is known for its thin insulation and flexibility. It's great for tight spaces in the car's wiring harness. AEX wire, on the other hand, is more heat - resistant, making it suitable for areas near the engine where temperatures can get pretty high. And AVS wire offers a good balance between flexibility and durability.
Tools You'll Need
First things first, gather the right tools. You're going to need wire strippers. These are essential for removing the insulation from the wire ends. Make sure to get a good quality pair that can handle the gauge of the Japanese car wires you're working with.
Crimping tools are another must - have. A proper crimp ensures a solid electrical connection. There are different types of crimping tools, but for Japanese car wire connectors, a ratcheting crimping tool is usually the best choice. It gives you a consistent and reliable crimp every time.
You'll also need a soldering iron and solder if you plan to solder the connections in addition to crimping. Soldering can provide an extra - strong bond, but it's not always necessary. Electrical tape or heat - shrink tubing will be used to insulate the connections after they're made.
Preparing the Wires
Once you have your tools ready, it's time to prepare the wires. Start by cutting the wires to the appropriate length. Make sure to leave a little extra length in case you need to make adjustments later.
Use the wire strippers to remove about 1/4 to 1/2 inch of insulation from the end of each wire. Be careful not to nick the wire strands while stripping. If you do nick the wire, it can weaken the connection and cause problems.
After stripping the insulation, twist the wire strands together gently. This helps to keep them from fraying and makes it easier to insert the wire into the connector.
Choosing the Right Connector
There are various types of Japanese car wire connectors available, such as blade connectors, bullet connectors, and pin connectors. The type of connector you choose depends on the application.


Blade connectors are often used for quick - connect and disconnect applications. They're easy to install and can be found in different sizes. Bullet connectors are great for high - current applications, as they provide a large contact area. Pin connectors are commonly used in multi - pin connectors for things like sensors and control modules.
Make sure the connector you choose is the right size for the wire gauge. Using a connector that's too small can cause a poor connection, while one that's too large won't hold the wire securely.
Crimping the Connector
Now, it's time to crimp the connector onto the wire. Insert the stripped end of the wire into the appropriate part of the connector. Most connectors have a crimp barrel where the wire goes.
Place the connector and wire into the crimping tool. Make sure the tool is set to the correct size for the connector. Squeeze the crimping tool handle firmly until it clicks. This ensures that the connector is crimped properly onto the wire.
Check the crimped connection. The wire should be held tightly in the connector, and there should be no visible gaps between the wire and the connector. If the connection doesn't look right, you may need to remove the connector and try again.
Soldering (Optional but Recommended)
If you want to take the connection to the next level, you can solder it. Heat up the soldering iron and apply a small amount of solder to the tip. Touch the tip of the soldering iron to the crimped connection, and then feed a small amount of solder onto the connection.
The solder should flow evenly around the wire and the connector. Be careful not to over - heat the connection, as this can damage the wire insulation. After soldering, let the connection cool down completely before moving on.
Insulating the Connection
Once the connection is made, it's important to insulate it. You can use electrical tape to wrap around the connection. Start by wrapping the tape tightly around the exposed wire and connector, overlapping the tape as you go.
Another option is to use heat - shrink tubing. Slide the heat - shrink tubing over the connection before you make it. After the connection is made and cooled (if soldered), use a heat gun to shrink the tubing. The heat - shrink tubing provides a more professional and durable insulation.
Testing the Connection
Before you put everything back together, test the connection. You can use a multimeter to check for continuity. Set the multimeter to the continuity setting and touch the probes to the ends of the connected wires. If the multimeter beeps or shows a low resistance reading, the connection is good.
If the connection fails the continuity test, go back and check the crimp or solder. Make sure the wires are properly inserted into the connector and that there are no breaks in the wire strands.
Tips for a Successful Installation
- Work in a clean and well - lit area. This makes it easier to see what you're doing and reduces the risk of making mistakes.
- Label the wires if you're working on a complex wiring harness. This helps you keep track of which wire goes where and makes it easier to troubleshoot later.
- Double - check all your connections before finishing the installation. It's better to catch a problem early than to have to go back and fix it later.
Conclusion
Installing Japanese car wire connectors properly is not as difficult as it may seem. By following these steps and using the right tools and techniques, you can ensure a reliable and long - lasting electrical connection in your car.
If you're in the market for high - quality Japanese car wires and connectors, I'm here to help. Whether you're working on a small repair or a full - scale wiring project, I can provide you with the products you need. Just reach out and we can start a discussion about your requirements.
References
- "Automotive Electrical Systems" by William H. Crouse and Donald L. Anglin
- Various automotive repair manuals for Japanese cars