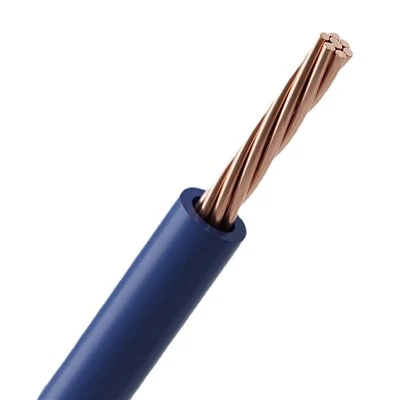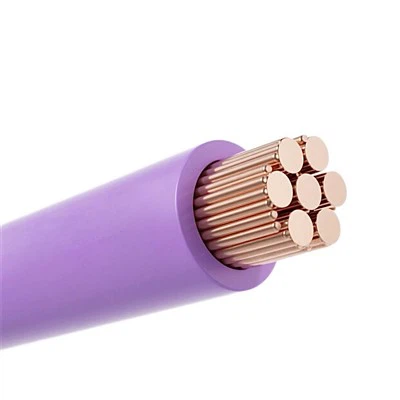

Soldering American car wire is a crucial skill for automotive enthusiasts, mechanics, and anyone involved in vehicle electrical system work. As a supplier of American car wire, I've witnessed firsthand the importance of proper soldering techniques to ensure reliable electrical connections in vehicles. In this blog, I'll share some comprehensive guidelines on how to solder American car wire effectively.
Understanding American Car Wire
Before we dive into the soldering process, it's essential to understand the different types of American car wire available. There are several types, each designed for specific applications based on factors like temperature resistance, flexibility, and current - carrying capacity.
One popular type is the American Standard HDT Automotive Wire. HDT wire stands for High - Temperature Resistance wire. It is built to withstand high - heat environments, making it suitable for areas near the engine block or exhaust system. This wire has a thick insulation layer that provides excellent protection against heat, abrasion, and chemicals.
Another common type is the GXL Automotive Wire. GXL wire is known for its thin - wall insulation, which makes it highly flexible. It's often used in applications where space is limited, such as in door panels or under dashboards. Despite its thin insulation, GXL wire still offers good resistance to moisture and abrasion.
The SXL Automotive Primary Wire is similar to GXL wire but has a thicker insulation. This added insulation gives SXL wire better heat and abrasion resistance, making it a great choice for general - purpose automotive wiring, especially in areas where wires may be exposed to more wear and tear.
Tools and Materials Needed
To solder American car wire, you'll need the following tools and materials:
- Soldering Iron: A good quality soldering iron with adjustable temperature settings is essential. For automotive wire soldering, a temperature range of 370 - 400°C (700 - 750°F) is usually appropriate.
- Solder: Use a lead - free solder with a rosin core. The rosin acts as a flux, which helps to clean the wire surface and promote better solder flow. A solder with a diameter of 0.8 - 1.0mm is commonly used for automotive wire.
- Wire Strippers: These are used to remove the insulation from the wire ends. Make sure the wire strippers are the right size for the gauge of wire you're working with.
- Heat Shrink Tubing: Heat shrink tubing provides insulation and mechanical protection for the soldered joint. Choose a tubing size that fits snugly over the wire and the soldered area.
- Flux Pen or Paste: In addition to the rosin in the solder, a separate flux can be used to further clean and prepare the wire surface for soldering.
- Wire Cutters: For cutting the wire to the appropriate length.
- Safety Equipment: This includes safety glasses to protect your eyes from solder splashes and heat - resistant gloves to protect your hands from the hot soldering iron.
Preparing the Wire
The first step in soldering American car wire is to prepare the wire properly.
- Cut the Wire: Use the wire cutters to cut the wire to the desired length. Make sure the cut is clean and straight.
- Strip the Insulation: Use the wire strippers to remove about 6 - 10mm of insulation from the end of each wire. Be careful not to nick or damage the wire strands during the stripping process.
- Twist the Strands: If the wire is made up of multiple strands, gently twist the strands together to prevent them from fraying. This will also make it easier to solder the wire.
- Clean the Wire: Use a flux pen or paste to clean the exposed wire strands. The flux will remove any oxidation or dirt on the wire surface, allowing the solder to bond better.
Soldering the Wire
Once the wire is prepared, it's time to start soldering.
- Heat the Soldering Iron: Plug in the soldering iron and set it to the appropriate temperature. Allow the soldering iron to heat up for a few minutes until it reaches the desired temperature.
- Tin the Soldering Iron Tip: Apply a small amount of solder to the tip of the soldering iron. This process is called tinning and helps to improve heat transfer and solder flow.
- Heat the Wire: Place the heated soldering iron tip against the wire strands. Hold the soldering iron in place for a few seconds to allow the wire to heat up.
- Apply the Solder: Once the wire is hot enough, touch the solder to the wire near the soldering iron tip. The solder should melt and flow evenly around the wire strands. Make sure the solder covers the entire exposed area of the wire.
- Remove the Soldering Iron: After the solder has flowed evenly, remove the soldering iron from the wire. Hold the wire steady for a few seconds to allow the solder to cool and solidify.
- Check the Joint: Inspect the soldered joint to make sure it is smooth and shiny. There should be no cold solder joints (where the solder is dull and grainy) or solder bridges (where the solder connects two adjacent wires unintentionally).
Insulating the Soldered Joint
After soldering, it's important to insulate the joint to prevent short - circuits and protect it from moisture and abrasion.
- Cut the Heat Shrink Tubing: Cut a piece of heat shrink tubing that is long enough to cover the soldered joint with some extra length on each end.
- Slide the Tubing onto the Wire: Before soldering the wires together, slide the heat shrink tubing onto one of the wires. After soldering, position the tubing over the soldered joint.
- Shrink the Tubing: Use a heat gun or a lighter to apply heat to the heat shrink tubing. Move the heat source evenly around the tubing to ensure it shrinks uniformly. The tubing should shrink to fit snugly over the soldered joint.
Troubleshooting Common Soldering Problems
Even with proper technique, you may encounter some common soldering problems.
- Cold Solder Joints: These occur when the wire or the soldering iron is not hot enough, or when the solder cools too quickly. To fix a cold solder joint, re - heat the joint with the soldering iron and add a small amount of additional solder.
- Solder Bridges: If you notice a solder bridge between two adjacent wires, use a desoldering pump or a desoldering braid to remove the excess solder.
- Insufficient Solder: If the soldered joint looks thin or has gaps, re - heat the joint and add more solder until the joint is fully covered.
Importance of Proper Soldering in American Car Wiring
Proper soldering of American car wire is crucial for several reasons. Firstly, a well - soldered joint provides a low - resistance electrical connection. This is important for ensuring that electrical signals are transmitted efficiently through the wire, which can prevent problems such as voltage drops and electrical malfunctions in the vehicle's electrical system.


Secondly, a properly soldered joint is more reliable and durable. It can withstand vibrations, temperature changes, and mechanical stress better than a poorly soldered joint. This helps to reduce the risk of wire breakage or loose connections, which can lead to electrical shorts and potentially dangerous situations in the vehicle.
Contact for Purchase and Further Information
If you're in the market for high - quality American car wire, whether it's American Standard HDT Automotive Wire, GXL Automotive Wire, or SXL Automotive Primary Wire, we're here to help. We offer a wide range of wire gauges and lengths to meet your specific needs. If you have any questions about our products or need assistance with your automotive wiring project, don't hesitate to reach out. We're always happy to engage in a purchase - related discussion and provide you with the best solutions for your wiring requirements.
References
- "Automotive Electrical Systems" by William H. Crouse and Donald L. Anglin.
- "Modern Automotive Technology" by James D. Halderman.