How to Repair Damaged PVC Wire?
As a PVC wire supplier, I've encountered countless situations where customers have faced issues with damaged PVC wires. Whether it's due to wear and tear, accidental cuts, or environmental factors, a damaged PVC wire can pose significant safety risks and disrupt electrical systems. In this blog post, I'll share some effective methods to repair damaged PVC wire, ensuring both safety and functionality.
Understanding PVC Wire
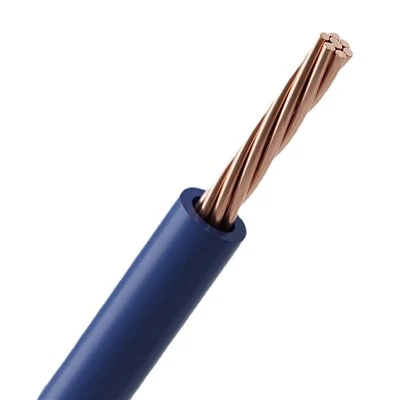
Before we delve into the repair process, it's essential to understand what PVC wire is. PVC, or polyvinyl chloride, is a widely used thermoplastic polymer known for its excellent electrical insulation properties, flexibility, and resistance to moisture and chemicals. PVC wires are commonly used in various applications, including household electrical wiring, automotive wiring, and industrial machinery.
There are different types of PVC wires available in the market, each designed for specific applications. For instance, UL 1284 PVC Insulated Hook-Up Wire is suitable for general-purpose low-voltage applications, while UL1007 PVC Insulated Hook-up Wire is commonly used in electronic devices and appliances. UL1283 PVC Hook Up Wire is another type that offers enhanced insulation and durability.
Assessing the Damage
The first step in repairing a damaged PVC wire is to assess the extent of the damage. This will help you determine the appropriate repair method. Here are some common types of damage and how to identify them:
- Cuts and Abrasions: These are the most common types of damage and can occur due to sharp objects or friction. Look for visible cuts or abrasions on the wire insulation. If the cut is shallow and has not exposed the conductor, it can usually be repaired with insulation tape. However, if the conductor is exposed, more extensive repairs may be required.
- Burns and Melting: Burns and melting can occur due to overheating or electrical short circuits. Look for signs of discoloration, charring, or melting on the wire insulation. If the damage is severe, the wire may need to be replaced entirely.
- Moisture and Corrosion: Moisture and corrosion can cause the wire insulation to degrade and the conductor to corrode. Look for signs of rust or corrosion on the conductor and discoloration or swelling on the insulation. If the damage is extensive, the wire may need to be replaced.
Repairing Minor Damage
If the damage to the PVC wire is minor, such as a shallow cut or abrasion, you can repair it using insulation tape. Here's how:
- Prepare the Wire: Before applying the insulation tape, make sure the wire is clean and dry. Use a clean cloth to wipe away any dirt or debris from the damaged area.
- Apply the Insulation Tape: Cut a piece of insulation tape that is slightly longer than the damaged area. Wrap the tape tightly around the damaged area, overlapping the edges by about half an inch. Make sure the tape covers the entire damaged area and extends a little beyond it.
- Smooth the Tape: Use your fingers to smooth out the tape and remove any air bubbles. Make sure the tape is firmly attached to the wire insulation.
- Test the Repair: Once the tape is applied, test the wire to make sure it is working properly. Use a multimeter to check the continuity of the wire and make sure there are no electrical shorts.
Repairing Major Damage
If the damage to the PVC wire is major, such as a deep cut or exposed conductor, you may need to use a more advanced repair method. Here are some options:
-
Splicing: Splicing involves joining two pieces of wire together using a splice connector. This method is suitable for repairing wires that have been cut or broken. To splice a wire, you will need a splice connector, a wire stripper, and a crimping tool. Here's how to do it:
- Prepare the Wires: Use a wire stripper to remove about half an inch of insulation from the ends of the wires that you want to splice. Make sure the conductors are clean and free of any dirt or debris.
- Insert the Wires into the Splice Connector: Insert the stripped ends of the wires into the splice connector, making sure they are fully inserted.
- Crimp the Splice Connector: Use a crimping tool to crimp the splice connector onto the wires. Make sure the connector is firmly attached to the wires and there are no gaps or loose connections.
- Insulate the Splice: Once the splice is crimped, use insulation tape or heat shrink tubing to insulate the splice. Make sure the insulation covers the entire splice and extends a little beyond it.
- Test the Repair: Once the splice is insulated, test the wire to make sure it is working properly. Use a multimeter to check the continuity of the wire and make sure there are no electrical shorts.
-
Replacing the Wire: If the damage to the PVC wire is severe, such as a burn or melting, the wire may need to be replaced entirely. To replace a wire, you will need a new wire of the same gauge and type, a wire stripper, and a pair of pliers. Here's how to do it:
- Disconnect the Wire: Before replacing the wire, make sure the power is turned off to the circuit. Use a pair of pliers to disconnect the wire from the electrical device or terminal.
- Remove the Old Wire: Use a wire stripper to remove the old wire from the electrical system. Make sure you remove all the insulation and conductors.
- Install the New Wire: Cut a new wire of the same gauge and type as the old wire. Use a wire stripper to remove about half an inch of insulation from the ends of the new wire. Insert the stripped ends of the new wire into the electrical device or terminal and use a pair of pliers to secure them.
- Test the New Wire: Once the new wire is installed, turn on the power to the circuit and test the wire to make sure it is working properly. Use a multimeter to check the continuity of the wire and make sure there are no electrical shorts.
Preventing Future Damage
To prevent future damage to your PVC wires, here are some tips:
- Use the Right Wire: Make sure you use the right type and gauge of wire for your application. Using the wrong wire can cause overheating, electrical short circuits, and other problems.
- Protect the Wires: Use wire loom, conduit, or other protective materials to protect the wires from damage. This can help prevent cuts, abrasions, and other types of damage.
- Avoid Overloading the Wires: Make sure you do not overload the wires by connecting too many electrical devices to them. Overloading can cause the wires to overheat and increase the risk of electrical fires.
- Inspect the Wires Regularly: Inspect the wires regularly for signs of damage, such as cuts, abrasions, or discoloration. If you notice any damage, repair it immediately to prevent further problems.
Conclusion
Repairing damaged PVC wire is an important skill that can help you save time and money. By following the steps outlined in this blog post, you can repair minor damage to your PVC wires using insulation tape and more major damage using splicing or wire replacement. Remember to always take safety precautions when working with electrical wires and test the repaired wire to make sure it is working properly.
If you have any questions or need further assistance with repairing damaged PVC wire, please feel free to contact us. We are a leading PVC wire supplier and can provide you with high-quality PVC wires and expert advice on wire repair and installation.
References
- National Electrical Code (NEC)
- UL Standards for Electrical Wires and Cables
- Electrical Wiring Handbook